❄️🔥 Effortless comfort, smart control—because your space deserves the best.
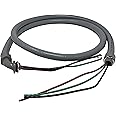
The MRCOOL Easy Pro 24,000 BTU ductless heat pump delivers efficient heating and cooling with an 18 SEER rating, covering up to 1,000 sq ft. Featuring a DIY-friendly 16-foot pre-charged line set, it supports low ambient cooling down to 5°F, ideal for diverse environments. Smart Follow Me technology and voice assistant compatibility elevate user convenience, while quiet 60 dB operation and washable filters ensure a seamless, low-maintenance experience.
| Brand Name | MRCOOL COMFORT MADE SIMPLE |
| Model Info | Easy Pro |
| Item model number | Easy Pro |
| Efficiency | 18 |
| Capacity | 16 Liters |
| Noise | 60 dB |
| Installation Type | Split System |
| Part Number | EZPRO-24-HP-23016-MPN |
| Form Factor | Mini-Split |
| Special Features | Heating And Cooling Function |
| Color | White |
| Voltage | 220 Volts |
| Wattage | 1366.94 watts |
| Floor Area | 1000 Square Feet |
B**E
Super easy installation.
I just installed this 9000 BTU mini split on my Ford E450 conversion camper. It works beautifully to keep the inside of my rig both cool and warm. With the DIY line set that is included with the kit it was a super easy installation. It is super quiet when it is running.
E**Y
Efficient and easy to install Mini Split
This is the second MrCool DIY unit I have installed and they have both been pretty easy for a knowledgeable DIY person. A couple of things that I have learned from the first install helped me greatly on the second.Follow the directions closely and read the entire install manual before starting anything (trust me).Make sure to have a helper for the heavy lifting it makes life a lot easier.I bought a mini split line set cover kit off amazon ($30) because the line set is facing the street and I wanted to protect and cleanup the look as well.I poured a small concrete pad using 2x4s as a frame (17”x30”). It required roughly 3 bags of concrete. Might be overkill but I let it cure for a week before using ¼” concrete wedge anchors to secure the unit to the pad. The dimensions of this pad fit the 9k BTU heat pump very well.My house has cement block which I thought was going to be tough to drill through but it wasn't. The key here is to buy a concrete hole saw. I bought mine on amazon for about $20. It drilled right through the wall with my corded hammer drill and light force. If you push too hard the bit will dull quickly. Let the tools do the work.I found the drain line to be a little short so I bought a mini split drain hose extension ahead of the install. (You may not need this but I installed mine high on the wall)You should get a licensed electrician to install the unit. However, the wiring is straightforward.Lastly, the MrCool system is great. The condenser is roughly 4 feet from my bedroom and I cannot hear it running at all. The inside unit is not noisy and the constant air movement (I have mine set to fan ON) helps me sleep while keeping the room at the perfect temperature. The efficiency of the unit has been quite surprising as my electricity bill has reduced compared to this time last year. We no longer cool\heat the entire house to keep our bedroom perfect. The MrCool app works pretty well too. I wish it had an auto off for the LED at night.I hope this helps you. I wish someone had told me some of these things before my first install.
J**S
A Real DIY Kit.
Came packaged very well and only took 4 hours to install. I wish a hole saw came with it but it wasn’t a big deal. I had absolutely no issues with start up nor leaks. Simply follow the instructions (which I read twice before proceeding). Remember when picking place to drill 3” hole make sure a wall stud is not in the way. Overall I’m very pleased.
K**N
DIY done right. Works well through the first 4 seasons
The install was fairly straightforward except for the line connection. You really need to review, plan, re-review, plan some more on how you run the connection through the wall. In my case it was a metal building with 4-6" foam on the walls. I had difficulty getting the bend that I wanted coming off the back of the wall unit and also the bend going down the outside wall. These lines are VERY EASY TO PINCH, so you have to be careful not to completely flatten them out when bending to the angle that you want. Take your time and make several small bends. I was worried that my bends had weakened the line, but it is still holding after 4 seasons of use. My bard is very large, 40x60, so this is unsized for the space that I'm heating/cooling, but I did not intend to control to household climate standards. I'm really using it to keep the barn above freezing and control summer heat/humidity. For that it works exactly as I intended. In prolonged sub zero temperatures, I assume that I'll need supplemental heat to keep the barn above 32 degrees. It never got below 40 last winter, but we didn't have the extreme weather of prior years. The wall unit is HEAVY. Plan for a 2-man installation and for a metal barn like mine, be sure to install a large cross board between posts so you have a secure mounting surface. Mount the outside unit on the ground (mine is bolted to a concrete slab). If you wall mount the outside unit, it will make the inside of your building hum or rumble all the time.
Trustpilot
1 month ago
4 days ago