


🏠 Elevate your entryway with style and protection!
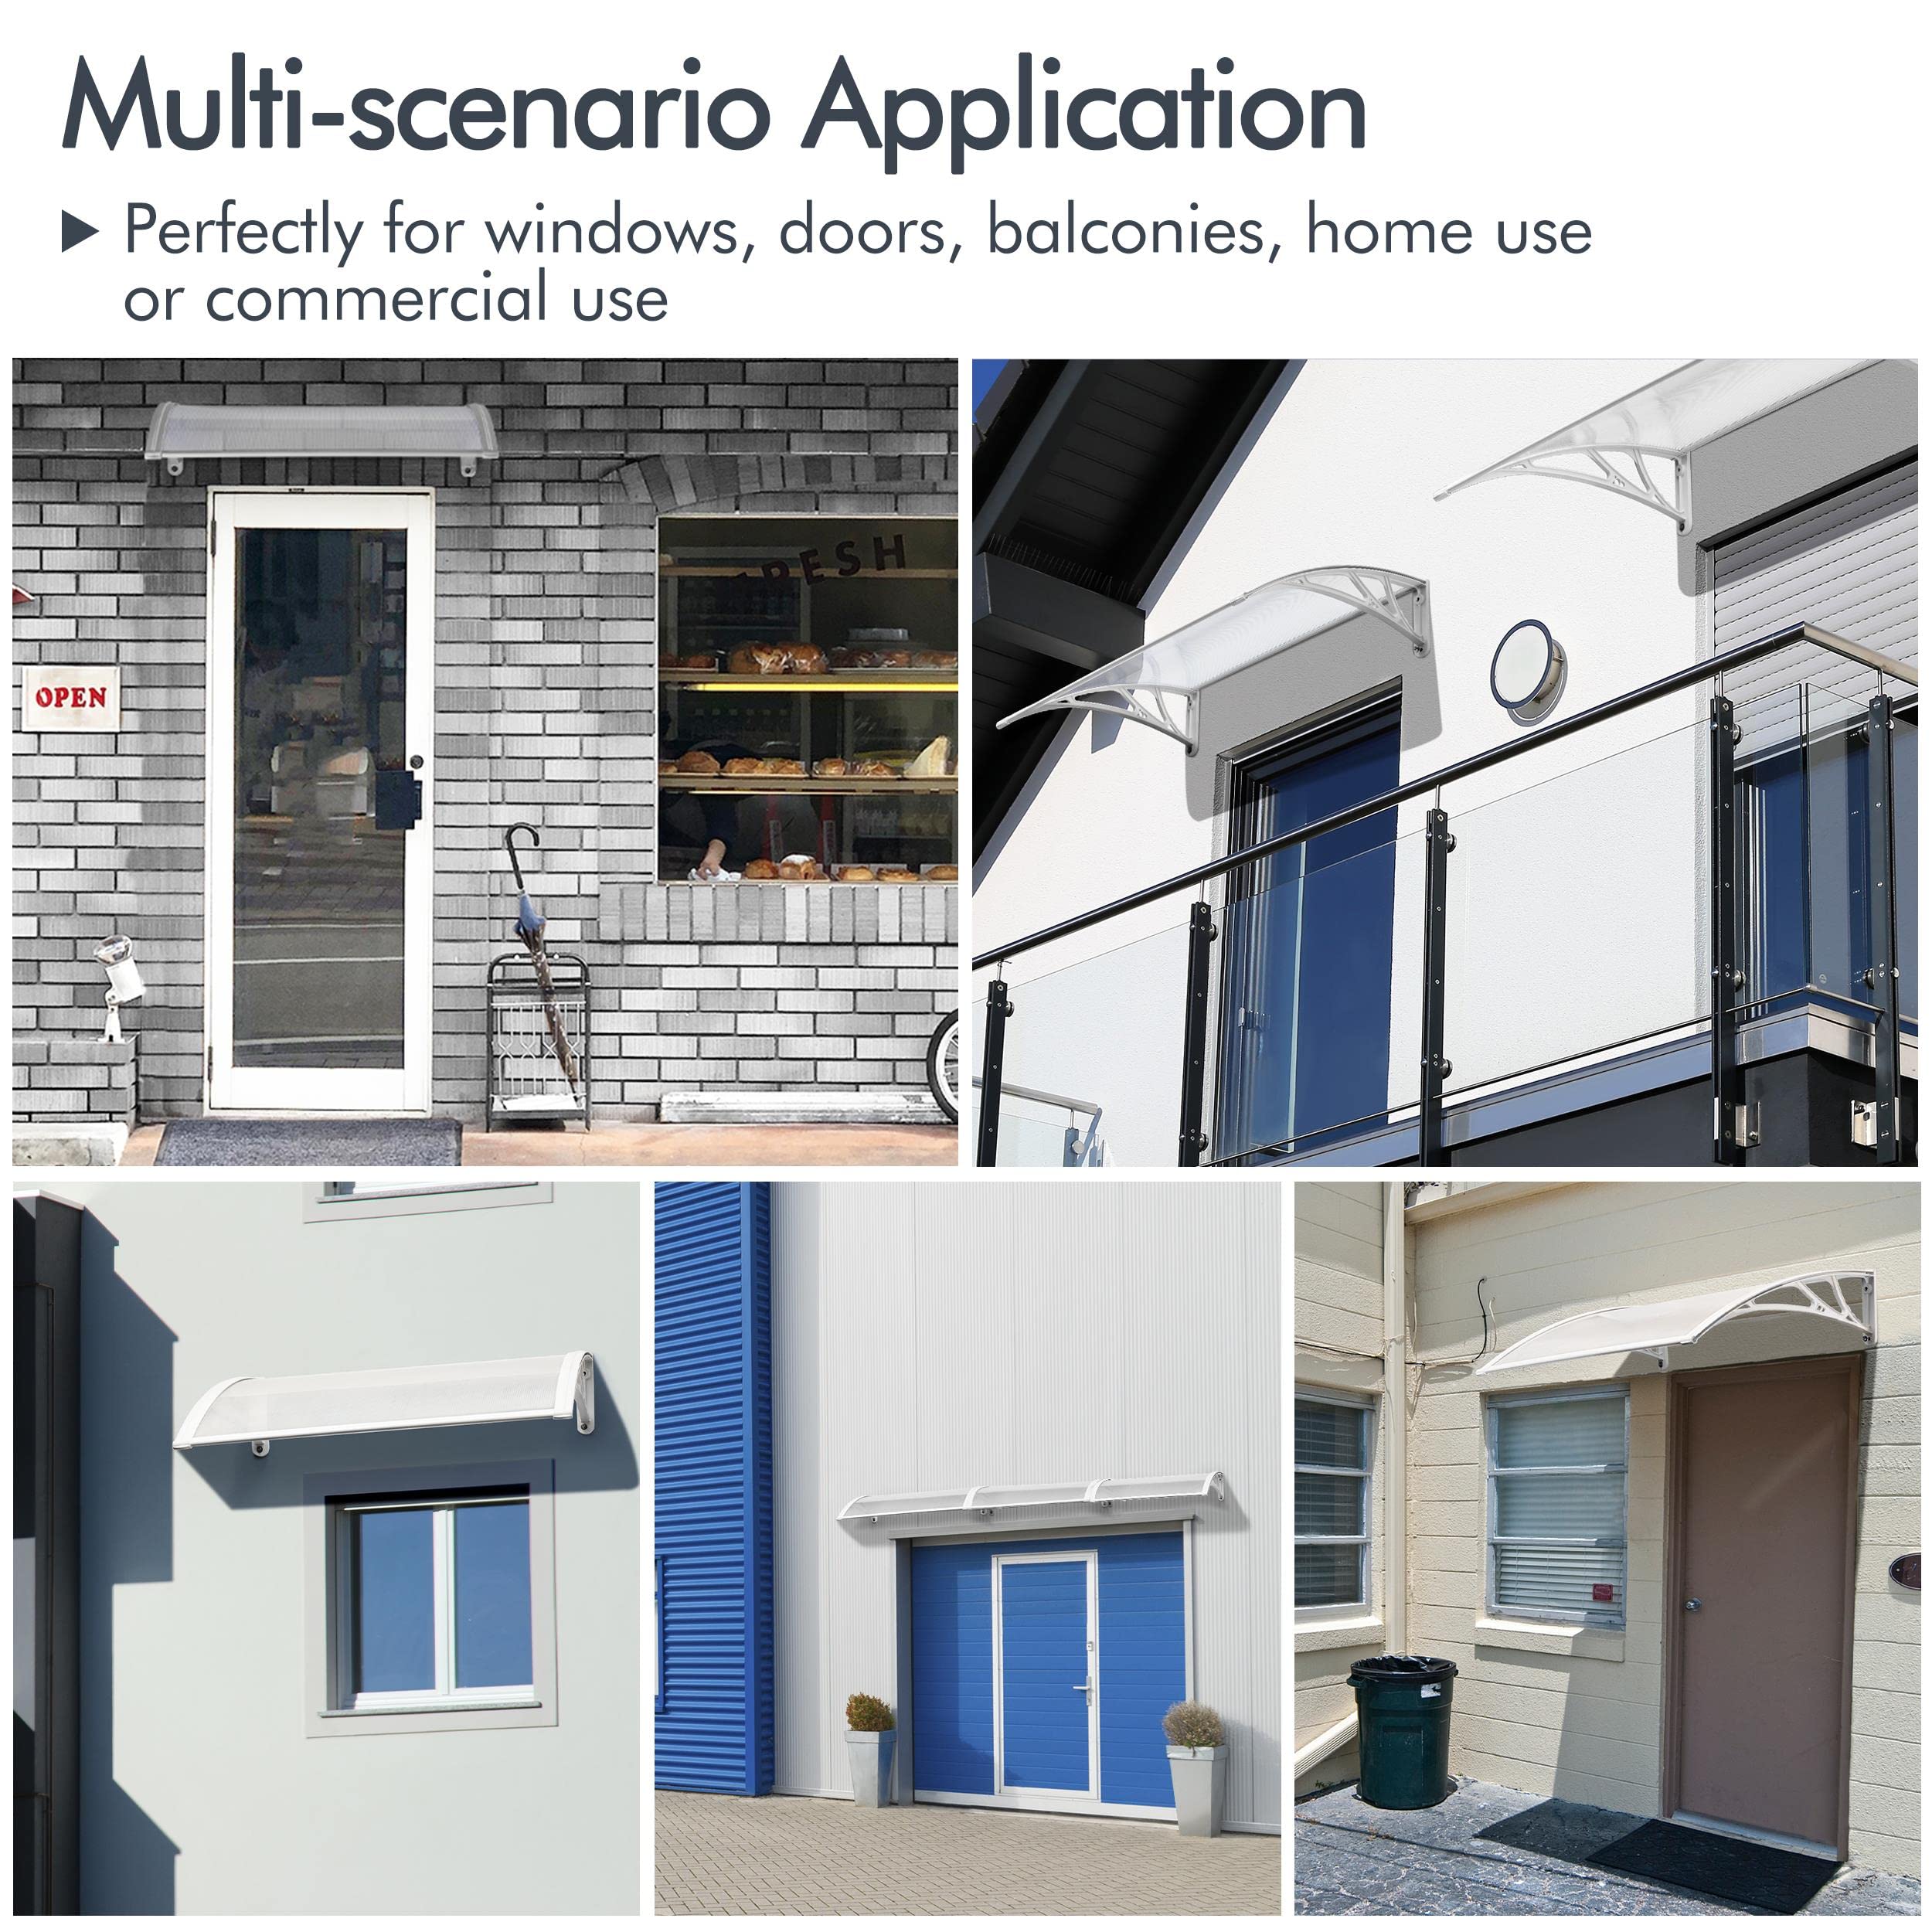
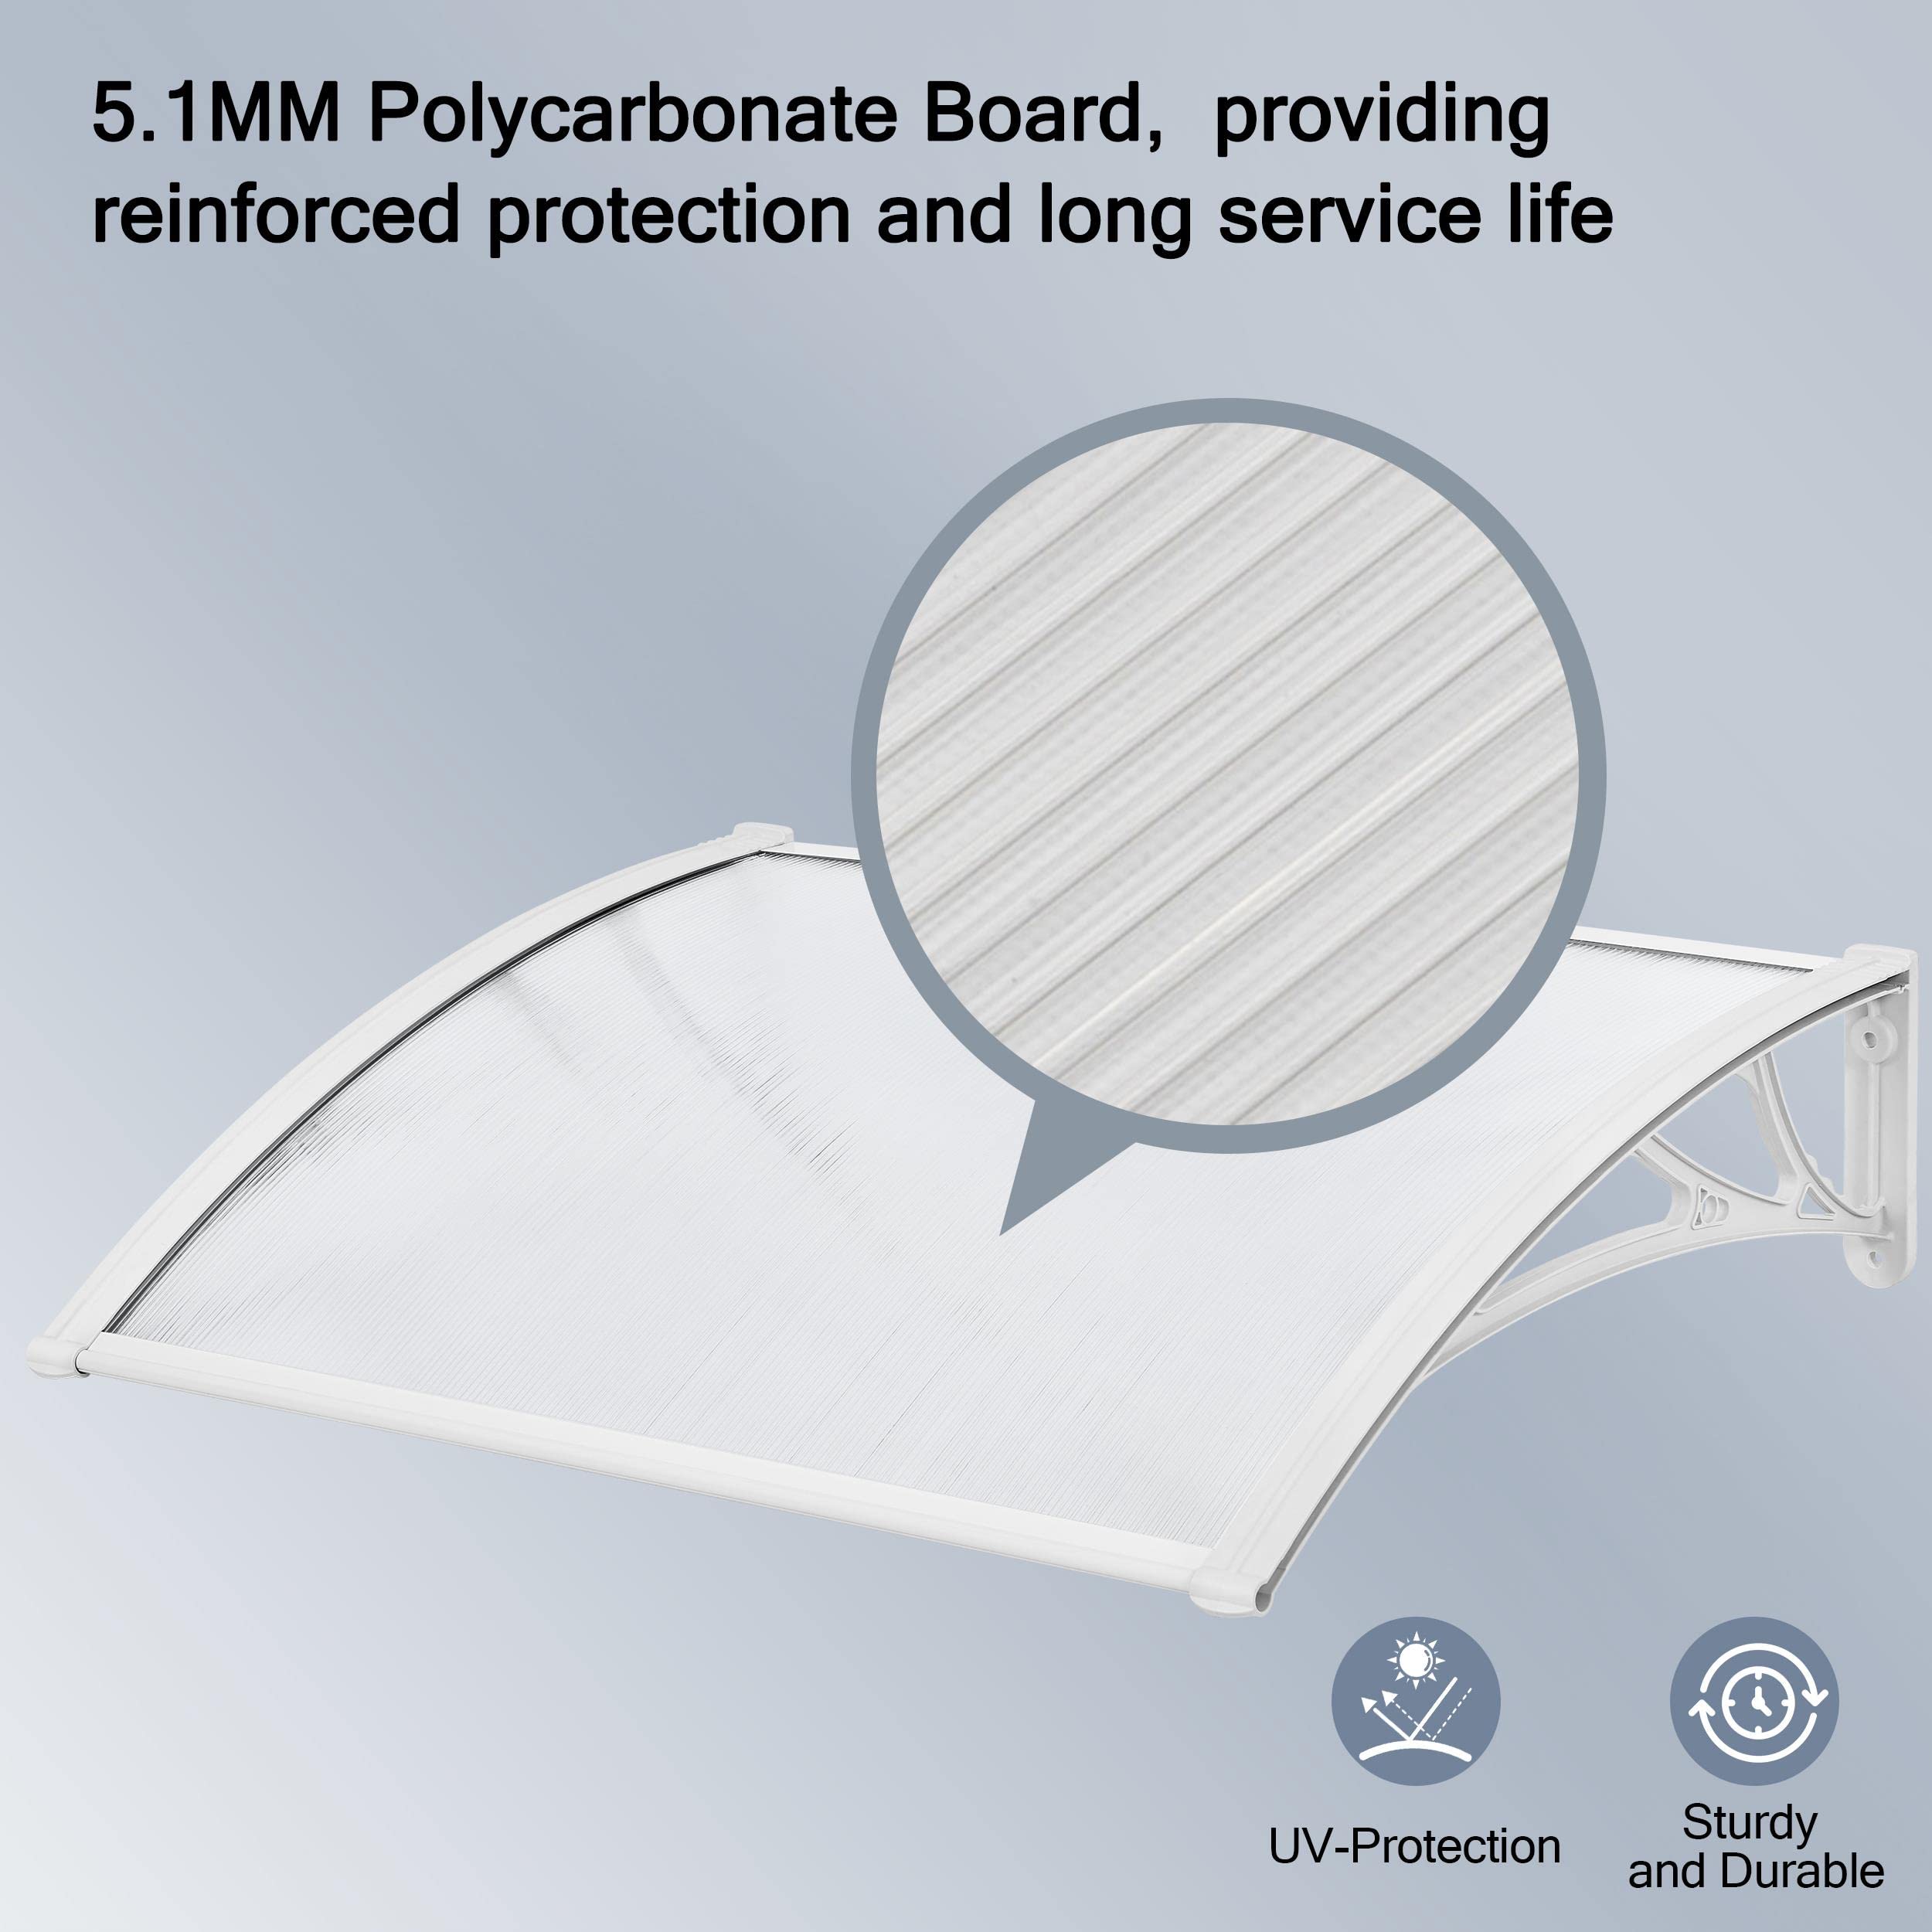
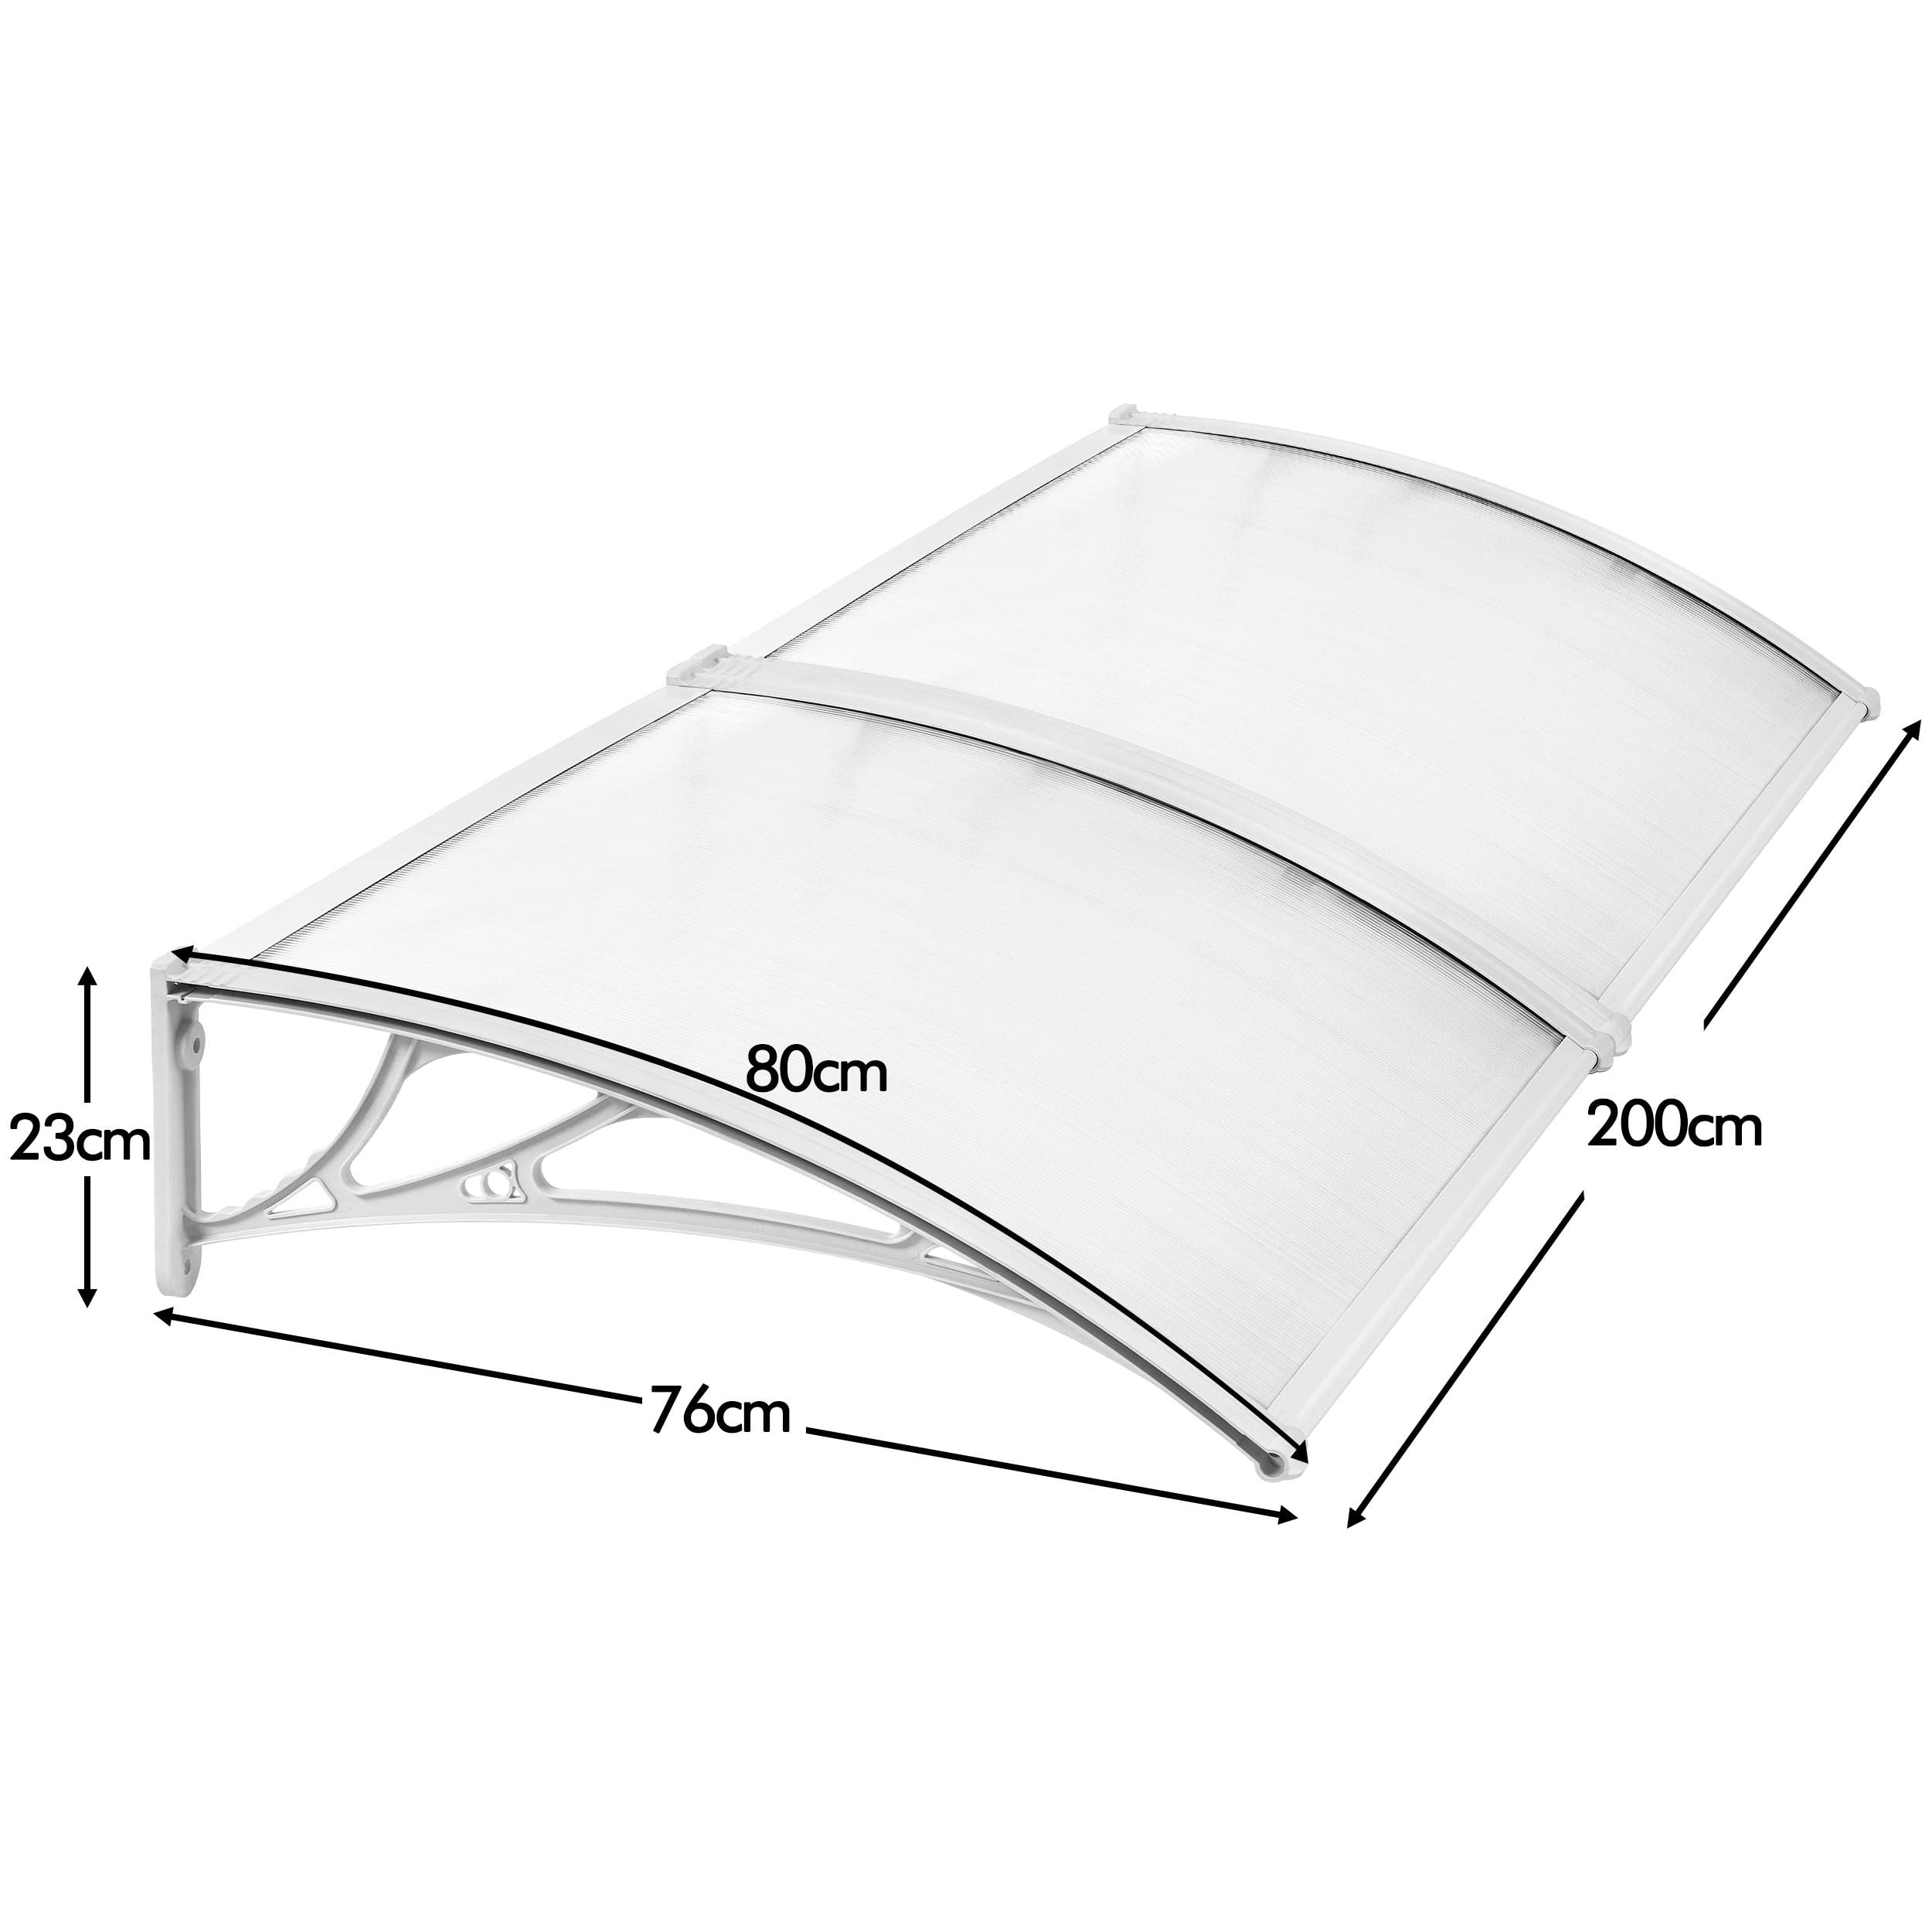
The Yaheetech Front Door Canopy is a versatile and stylish outdoor shelter designed to protect your entryways from harsh weather conditions. Measuring 200x80x23cm, it is constructed from durable materials, ensuring longevity and resistance to deformation. Its modern design not only serves a functional purpose but also enhances the aesthetic appeal of your home. With easy installation and dual-use features, this canopy is the perfect addition to any home.
A**R
Good for what it is!
I waned to put the canopy over the back door,It was to wide and to deep so I had to cut it to length and reduce the brackets top and bottom it was easy to cut to length but a little more of a challenge to alter the bracket length.As doing so lost the fixing holes.I drilled new fixing points and it fitted the space I need it to fit!The only thing this you should not do is follow the drill suggested for the bolts supplied as it’s not correct do your own calculation on the drill size as the suggested 12 m drill is tooooo big for the bolts that came with it!!
R**M
Good product but incorrect drilling instructions
I’m not much good at DIY but I found this very easy to assembly and did it on my own. Installation required a second person to help.The instructions state “drill 12mm holes” (see photo). This is incorrect as 10mm is the right size.Another reviewer made the same comment and I followed his advice (thank you). I’m very happy I did. The manufacturer didn’t bother correcting the instruction booklet. Please change instructions before other make mistakes
L**N
Sturdy
Bought the canopy for front door, it's very sturdy, easy too fit together, but. Needa two people, bolts supplied are OK no problem, very happy,
L**T
Sturdy, easy to assemble and install
Bought to cover a standard width external door, went for the 120cm wide so it would overhang each side instead of sitting level. The assembly instructions were just a picture of it in bits then assembled so not much use, though having said that it wasn't too difficult. I found it easier to insert the clear "roof" part in the curved grove on one of the end brackets first, then slide the straight aluminium supports on to the clear part and slide them into the bracket and finally put the other bracket on the end. Installation was pretty simple as well, the whole thing is pretty light but is quite cumbersome so if you have someone who can hold it while you mark the holes it will be easier. The bolts that came in the box were surprisingly sturdy, usually I swap out fixings that come with stuff as they're rubbish but these were alright.
R**E
"Assembling Instructions" - That's a joke!
I purchased this canopy last month but due to excessive rain in my region, did not make a start on fixing it up until last week. I watched a video on You Tube before starting - and I recommend you do this too. The guy in the video suggests that if you are going to attempt the installation by yourself, firstly put the frame and acrylic sheet together as indicated in the "instructions" provided. (More about that later).Fitting the flat acrylic sheet into the curved end brackets is not as easy as you might think, because the sheet is VERY resistant to bending! You really would do better with THREE hands and arms for this part! You need the extra hand to push the sheet in the middle to bend it. Once you have forced one end of the acrylic sheet into the bracket, you then need to force the other end into the opposite end bracket. I suggest the easiest way to do this is to stand the canopy bracket (that you've just fixed into the acrylic sheet) on the floor, then force the second end bracket over the open end of the acrylic sheet, by firstly pushing the sheet into one end of the curve and bending the sheet as you push down on the upper bracket. When you have these main three pieces together, screw in two of the SMALL steel "bolts" supplied, which hold the end bracket to the acrylic sheet. Once this end is secure, you can flip the canopy onto the opposite end and screw in two more small steel "bolts", which I would really call screws. The instructions seem to have mixed up what the UK refers to as screws (which have a sharp end) with bolts (which do not). Later you will see that what they call "Setscrews" are really what we would call "Rawlbolts".Now - the advise for fitting one by yourself: The YouTube video suggests marking the four holes (where the end brackets need fixing to the wall) on a flat piece of wood, then drilling through the piece of wood and following through into your wall. For anyone who does not have a spare piece of timber, I suggest using one side of the thick cardboard box it is supplied in instead. Place the assembled canopy onto the box and mark the four holes with a pen/pencil through the holes in the end brackets onto the cardboard. Then drill or use a sharp tool or screwdriver to open these into 4 small (10mm) holes. Using a piece of cardboard against the wall is far easier than trying to hold the entire canopy up there, on a step ladder by yourself, especially as you would have to hold it with one hand, with no spare hand to hold the ladder - or to mark the wall either! If you have a standard/modern brick wall, then I assume that the bricks will be level, so you don't need a spirit level to check your markings are level BEFORE drilling! REMEMBER to check that if your canopy if being installed above OUTWARD-OPENING DOORS, that the outer (lowest) edge of the canopy is sufficiently far above the top of the doors. ( such as French doors/windows). You must do this before drilling, so hold the canopy in position with the French doors open below to check for clearance. No need of course, if installing above an inward-opening door or sliding patio doors.Another reviewer on here has pointed out that the 4 "SETSCREWS" provided, being 80 mm long are around the same width as a house brick. This is not good, because as another reviewer said, this means the innermost part of the Setscrew is beyond the innermost edge of the brick, whereas it needs to be INSIDE the brick when tightened to ensure a good grip! (It would have been better if the Setscrews provided had been 60 or 65 mm long for use in bricks). If you are drilling into stone, maybe no problem with the 80 mm long setscrews.Please DO NOT make the mistake of trying to "test" the assembly in situ beforehand, as suggested by one reviewer! By hammering the Setscrews even partially into the wall to check for alignment makes it virtually IMPOSSIBLE to remove them! Note that the 10 mm holes you have drilled only just allow the Setscrews to be hammered in - and once in - they are NOT willing to be pulled out, no matter how hard you try! As you try to pull the Setscrew out, the tapered nut expands the sleeve, forcing it open and locking the bolt sleeve against the drilled hole! Just make absolutely certain that your 4 pre-drilled holes are aligned as you want before hammering in the Setscrews!!! It is NOT CLEAR on the "instructions" provided that you MUST FIT the setscrews through the end brackets, so that the hexagonal bolt heads and steel washers are on the outside of the brackets and the bolt's expanding sleeves and retaining nuts are on the inside edges of the end brackets.The "Assembling Instructions" supplied are only 4 small diagrams - you have to guess what they mean! They are far from clear, to say the least and are the worst item in the entire canopy kit!
M**B
Great Product
I am one of those annoying Amazon customer who reads reviews, but does not leave any.I had to make an exception having bought this.I was looking for a replacement for my current old and discoloured canopy.I was initially disappointed that the item wasn't on Prime, but it arrived within 2 days of placing the order.The item is exactly as described.It is incredibly well packaged.It is sturdy and easy to assemble.Given its price, this is exceptional value for money.Do not hesitate to buy.
A**R
Great value
A clever design that makes putting together simple.I really don't see the need for such strong fixings tothe wall when the whole thing is plastic and very light.I fixed mine with sturdy screws that are perfectly adequate.
N**S
Low cost canopy.
A perfect low-cost canopy to deflect rain away from a new extension door.
Trustpilot
1 day ago
4 days ago
