🛠️ Elevate Your Kitchen Game with InSinkErator!
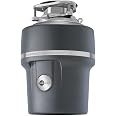
The InSinkErator Evolution Essential XTR is a top-tier garbage disposal featuring a powerful 3/4 HP motor, advanced noise-reduction technology, and durable stainless steel components. Designed for efficiency and longevity, it includes a convenient air switch and power cord, making it the perfect addition to any modern kitchen.


| Manufacturer | InSinkErator |
| Part Number | Essential XTR |
| Item Weight | 19 pounds |
| Product Dimensions | 8.75 x 8.75 x 12.6 inches |
| Item model number | Essential XTR |
| Is Discontinued By Manufacturer | No |
| Size | No Size |
| Color | Gray |
| Style | Without Installation Tool |
| Finish | Stainless Steel |
| Material | stainless-steel |
| Pattern | Garbage Disposal |
| Thickness | 1 Inches |
| Voltage | 120 Volts |
| Item Package Quantity | 1 |
| Mounting Type | Plate Mount |
| Included Components | power cord, sink top switch, disposer, installation manual |
| Batteries Included? | No |
| Batteries Required? | No |
| Warranty Description | We come to you 9-year in home limited warranty |
V**Y
Surprisingly quiet
I've included a few tips before my review. If you just want the review, scroll down to "My review":BEFORE YOU BEGIN INSTALLING:(1) Take pictures of the until that you will be replacing. You may already know how it's supposed to be hooked up, but it wouldn't hurt to take them for reference, anyway, just in case. You can always delete.(2) remove the plastic piece in the dishwasher hose hookup by laying the unattached disposal on on its side (on a towel), inserting a small flat screwdriver in the hole against the side, and banging the screwdriver with a hammer, repositioning the screwdriver all around the side of the hole, where the plastic is scored. Be sure to retrieve the "broken" piece and throw it away, so it won't end up being ground up in the disposal. I say this because one particular YouTuber was whacking away at it while the disposal was hanging, absorbing all kinds of blows. Let your floor brace the hits instead of the three screws holding the entire unit in the air. Whacking at it mid-air could weaken your assembly.(3) install the power cord and then wrap it around the body of the disposal and tape it in place. This will prevent the cord from getting in your way during installation, but will make it easier to wire than if it was hanging in the dark cabinet.(4) install the stabilization pipe-that black "L" shaped pipe-to the unit. I couldn't get the ring clamp to stay on the small rubber piece, so I taped it with electrical tape. We'll see what happens! It's easier to install it while it's on the floor than hanging up.(5) I wrapped a pillow with a heavy trash bag and placed it in the cabinet, under the disposal; just in case it drops (and it did), which absorbed the blow. I'm SO glad I didn't shrug off that piece of common sense floating around in my head! Otherwise, we would've had a disposal-shaped hole in our cabinet floor (but perhaps more cabinet space)My review:The installation wasn't as easy for me as it is for most. Throughout the entire ordeal, I vowed to never buy this unit again. In fact, halfway through the installation, I came in and wrote a nasty 1-star review (THAT'll teach 'em to add rings to appliances, when they haven't invented tools to remove them!). We had problems removing the ring from the old disposal and also from this one. I rigged the ring a bit to make it easier to install. I installed everything in the sink opening, including the ring. Then I discovered I forgot to install the black rubber splash shield. So I uninstalled everything, including the unbearable ring. With all the pieces scattered, I couldn't figure out how to install the black rubber splash shield. I looked at the old unit, and noticed the rubber shield was actually attached to the unit, itself. I watched videos and discovered that piece is removable from the sink hole! So I reinstalled the sink hardware. I will say, it gets easier the third time. Once the garbage disposal was finally up and running, I barely remember all the pain it took to get it there. It's kinda like childbirth, except I don't have to worry about putting this bad boy through college, after years of eating all my leftovers.I don't know why everyone complains about the slow drainage and small opening. Just remove the splash shield and toss your rejected food items into the hole and replace it before you turn on the disposal! Easy peasy bumble beesy! The only reason that piece is necessary is to prevent food from being splashed up out of the sink hole during the grinding process. Am I right? I don't think it's there to prevent you from getting your digits snipped. In fact, should that misfortune occur, the doctor is going to have to snip that rubber shield off your wrist when it comes out with your mangled hand (don't worry...I think you can reorder them). Just don't forget to add the splash shield before turning on the unit. I keep mine on the button so I won't forget to add it before grinding. My mom bought me a special disposal stopper/scraper that I use instead of the stopper (the purple one shown in the attached image). It can be closed to stop water or opened to drain water, but saves silverware from being dropped in and chewed up.This unit is very quiet. I thought, after the entire installation ordeal the thing was broken! It replaced a Badger 5 that suddenly froze and rusted. The Badger was very noisy, but aren't all disposals? Apparently not! NOW what am I going to depend on, when my husband's endless jokes become too corny? The dishwasher is quiet, and now the disposal? Sheesh! I was able to simply flip a switch, and my husband would say, "I can see you're busy. I'll leave you alone", and walk out the kitchen. Magic! Now he just continues to talk over the quiet grinding. I miss the good ol' days!About that switch...I didn't expect the button to work. It's an air pipe! I mean, how?...what?....I'm speechless because it DOES work! I don't leave the switch on all the time. I do keep it turned off when I don't plan to dispose of food. But the cool thing is I don't have to worry about someone "turning on a light" while my hand is in the drain. There are too many jokesters and pranksters in my family! And whether they are joking or not, all is fun and games until a flying finger puts out an eye. The button works with the switch. If the button is "on" when the switch is on, it will stay on when you switch it off. Same thing if it's off when you turn off the switch. Turn the switch on, but the unit is still off. So I button it off, then switch it off. No more worries!This unit is really not THAT much larger than the Badger 5. We didn't have to do any trimming to the pipes to make it fit. No leaks so far! I used plumbers puddy on both the sink hole and main pipe hole; and Tplus2 on the dishwasher pipe. I do not have a gap stop on my sink hooked to the disposal. The dishwasher pipe leads straight to the disposal. However, I never put food in the dishwasher, even if it WAS built to load unscraped plates of food. It took one clogging to keep me from dirty loading (and I think all that clogged food belonged to the previous homeowners...ew!)All in all, dispite my threats of never ever buying this model again, I think I would buy it. I overestimate the capabilities of my brain, and get ticked when things don't work. But so far this is a great unit. I'll edit this review if things go wonky, but...yeah... I actually WOULD recommend this particular garbage muncher. 🙂
A**R
So easy!!
We moved into our house four years ago. I have no idea how old the garbage disposal was, but it bit the dust a couple weeks ago. Since my husband isn't very handy, a lot of the home chores fall to me :P The old one was an InSinkErator and my research showed that they are designed to switch out very easily - so it seemed like a no-brainer to just buy a new one. SO EASY!! I'm a mid-fifties accountant with no plumbing skills...if I can do this...anyone can! The only tricky part was holding the new disposal up to the correct spot and twisting it. It was a little heavy for me, but I just pushed through. Once it caught in the right place, twisting it on was easy. The whole process took me about 45 minutes and I read ALL directions as I'm going :D I didn't change out the drain, or the sink button as they were still fine. I just connected it all to the new disposal. The new one is a thousand times better than the old one. It is SO quiet. Like scary quiet because I'm afraid someone is going to put their hand down in there with it running. Works like a charm!! So, irrational fears aside, this thing was a total winner!!
P**T
Easy to Install and Very Quiet
I moved into my house 18 years ago. A 3/4 hp KitchAid Disposal was already installed and was not new. So it lasted more than 18 years. It finally died. The InSinkErator was easy to install. If you are a visual person, there are plenty of excellent YouTube videos that show you how to install the disposal right out of the box to completion. Getting the old unit out was difficult. The supporting hardware was so corroded by the water that I had to use a hack saw between the backup flange and sink flange- ugh! The InSinkErator is much more compact in size than the old unit; I now have much more storage space underneath. I already had an outlet power switch in a metal receptacle installed. Rather than hard wire the switch to the disposal, I cut the plug off the wire exiting the plastic receptacle (included in the kit) and hard wired it to the outlet switch. I then hard wired the electrical cord (also included in the kit) to the disposal and then plugged it into the receptacle. There are no directions to do this but if you know how to replace a plug on a cord to a lamp it’s simple and again there are YouTube videos that explain this. The only tricky part was figuring out which wire inside the plastic receptacle was hot vs neutral. All the wires in the receptacle are green. Luckily, I discovered that the individual hot and neutral wires in the outer covering of the cord have different textures but you have to look at them very carefully- it does not jump out at you. Works great and very quiet. I highly recommend it.
B**B
Very quiet.
After one year, still amazingly quiet. Very powerful. Do have to batch feed larger loads due to collar design. Be aware that if you use it without the rubber flap collar the ground material may spray out. But - the collar also helps keep it quiet. Overall, very satisfied.
Trustpilot
1 week ago
3 days ago